STORE TAGS — CLEARANCE SALE
2 Penny a tag !
CLEARANCE SALE
Click Here To See: The Clearance Tags Selection

STORE TAGS — CLEARANCE SALE
2 Penny a tag !
CLEARANCE SALE
Click Here To See: The Clearance Tags Selection
 New Item
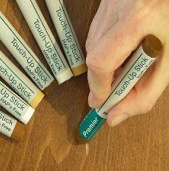
• Half Length BURN-IN STICKS
A traditional Shellac Burn-In (hot melt) Stick made from the finest shellacs and resins.
Ideal for use on older shellac finishes and for fine antique repairs.
Used for chip, dent, and hole repairs on wood, stone, & marble.
Accepts any type of topcoat, low heat will not lift or swell the repair.
(Made in the USA by Merit Industries) – – New Length 3 3/8 in x 1/2 x 3/8
• Only $3.69 ea. — Order Page – Click Below
https://www.shellac.net/MERIT-Burn-In-Sticks-Half-Length-Singles.html
For a listing of Full Length Sticks, sorted by COLOR CATEGORIES (Click Here)
Finishing and restoring using traditional techniques
“There has been much written on French polishing, never has an offering
been so well illustrated — it is complete and well done, you will find it a valuable reference.
We recommend this book, if you have any interest in learning about French polishing
or improving your craft, BUY THIS BOOK !“
Get the inside story from a hands-on pro. You can easily master all aspects of French polishing with this complete guide with all the must-know details, including:
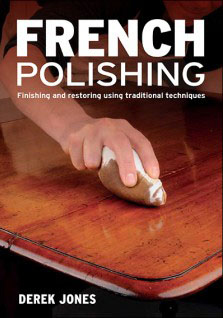 Techniques for applying layers of shellac to achieve a warm glow
French Polishing
Finishing and restoring using traditional techniques
• ISBN: 9781621136729 • Paperback • 5 7/8 x 8 1/4 • 112 pages
• well illustrated, over 150 color photos, & many highlighted ‘Pro Tips’
Purchase on page: Shellac Variety & Price Listing
• • • • •
• NEW Item
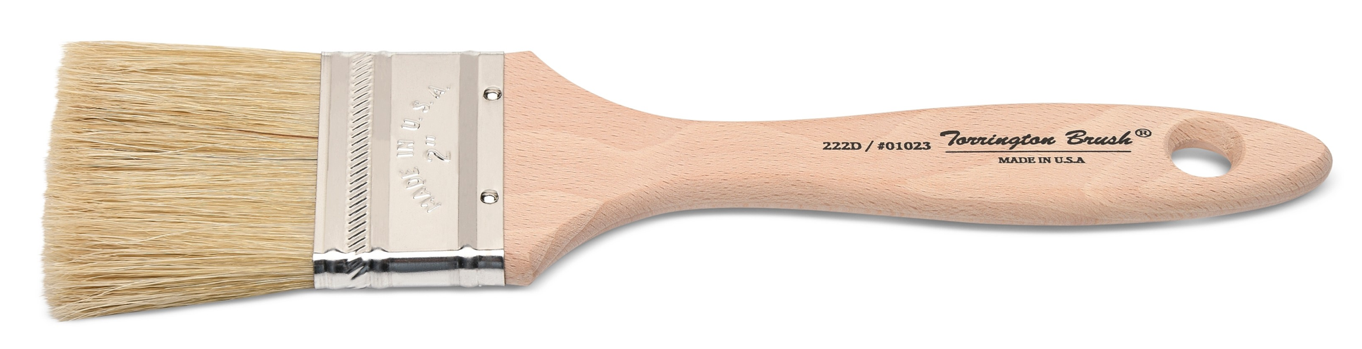
SINGLE FILL NATURAL BRISTLE BRUSHES
Single Fill Natural Bristle Brushes
• These are well crafted Single Thick Shellac,
Varnish, & multi-purpose brushes.
• 100% premium un-dyed natural hog bristle.
• Epoxy set for solvent resistance.
• Plated ferrule. • Smooth unfinished Beech wood handle.
NOT Recommended for use with waterborne finishing materials.
Made in the USA
Six sizes from 1″ to 4″ — See Selection, Click here:
Premier Touch-Up Materials on Sale
Stock Up for future projects. — Sale Limited to stock on hand
Click to: See the Premier On Sale List
![]() Shellac.net Wood Finish Supply & MERIT Industries
Shellac.net Wood Finish Supply & MERIT Industries
Mohawkfinishsupply.com
Authorized Mohawk Distributor
2465 Second Street, Napa CA 94559
New Hours Monday – Thursday 9:00 am to 4:00 pm
Saturdays – by Appointment.
707-299-8016
Please stop by our NEW Showroom when you’re in the Napa area.
Location Access:
from Hwy 29: take the First Street exit
at the Roundabout, RIGHT on California (One block) to 2465 Second
From Downtown Napa:
take 2nd St. west, one block past California to 2465
See: Shellac.net Variety Listing
To: MOHAWK, H.BEHLEN & Select Finishing Materials
To: MERIT Industries products index
![]() Original BEHLEN QUALASOLE™ French Polish
Original BEHLEN QUALASOLE™ French Polish
Behlen B611-00016 • Mohawk M638-22706
 YES ! (back by popular demand).
By special order and production Qualasole™ French Polish will soon be available sporting the Mohawk and Behlen logos and product numbers.
The original BEHLEN Qualasole™French Polish
is an exclusive product, manufactured at Mohawk
expressly for Wood Finish Supply / Shellac.net
New April 2024 Production SHIPPING NOW
To The Order Page: Qualasole™ is available in quart bottles,
priced at $36.95 + shipping.
Read the original Qualasole application information
from the 1944 Behlen Book
“The Art of Wood Finishing”
All Milk Paint on Sale
Stores well, Unlimited shelf life,
Stock Up for future projects.
HUGE DISCOUNTS
Click Here: for the entire list here
Sale limited to the stock on hand
|
Shellac Solvent: Shellac is a wonderful finish with a fantastic First, there is no industry regulation Second, is that there is no way of knowing |
In short, denatured alcohol is an Prior to Prohibition here in the United Note: Everclear 190 is not available in all states. |
| ‘Everclear 190’ is a 190 proof Ethanol. Everclear 190 Grain Alcohol is currently banned in 14 states that have ruled 190 Proof Everclear Is Not Legal (2023) include: California – only 151 proof available = 75.5% alcohol & 24.95% water District of Columbia Florida Hawaii Iowa Maine Maryland Massachusetts Michigan Minnesota Nevada New Hampshire New York North Carolina Ohio Pennsylvania Virginia Washington Everclear, (less than 190 Proof) available in the states above IS NOT Recommend for use as a solvent for shellac. 190 Everclear is a brand name of rectified spirit (also known as grain alcohol and neutral spirit) produced by the American company Luxco (formerly known as the David Sherman Corporation). It is made from grain and is bottled at 60%, 75.5%, 94.5% and 95% alcohol by volume (120,151, 189, and 190 U.S. proof respectively). |
Everclear 190 proof (5% distilled Water) A good Solvent for making Shellac is legal in 36 states. States where ‘Everclear 190’ Is Legal (as of 2023) Alabama Alaska Arizona Arkansas Colorado Connecticut Delaware Georgia Idaho Illinois Indiana Kansas Kentucky Louisiana Mississippi Missouri Montana Nebraska New Jersey New Mexico North Dakota Oklahoma Oregon Rhode Island South Carolina South Dakota Tennessee Texas Utah Vermont West Virginia Wisconsin Wyoming |
| Lacquer Retarder helps avoid Blushing caused by Cold Humid Wet Weather Lacquer retarder is used to help eliminate “blushing”, the white foggy look caused by HIGH humidity or rainy and cool/cold weather. This blush sometimes is only observed in areas where the build of the coating is thicker such as bull-nosed edges. Blush retarder keeps the finish wet longer allowing the trapped moisture to escape the coating. Another advantage is an even flow of the lacquer. To Eliminate Orange Peel & Over-Spray, Use Flash-Off Control Solvent – The Hot Weather Additive. Generally, Blush Retarder Is Overused. In cases of orange peel or overspray, Flash-Off™ Control Solvent is the best choice to solve the problem.Flash-Off™ Control is used to improve the flow of lacquers and lacquer sealers without slowing the overall drying time. The addition of a few ounces of Flash-Off™ Solvent per gallon of lacquer will solve orange peel and overspray roughness. Flash-Off™ Control Solvent will improve flow and yield overall film smoothness. |
Flash-Off Control Solvent Use: Add 3 to 5 ounces, Flash-OFF per gallon, to Mohawk air dry nitrocellulose, pre-catalyzed and post-catalyzed lacquer coatings. More Flash-Off™ may be added, up to10% by volume if needed, but that will increase dry time. DO NOT add Flash Off Control to water base lacquers or conversion varnishes. (NOT for use with Shellac) About Lacquer Thinners: Avoid Overuse of Lacquer Thinner Most lacquers come ready to spray. This includes Pre & Post Catalyzed, Air Dry, Instrument & Piano lacquers. If the spray gun is set properly, add Lacquer Thinner only as absolutely necessary to achieve a proper spray pattern. Adding more thinner does not help the flow-out or drying time. Control lacquer flow-out with Flash-Off Control Solvent. If blushing is the problem, use a small percentage of blush retarder. Lacquer solids generally are somewhere between 20% – 25% solids and formulated to be, Air Quality VOC’s (volatile organic compounds / smog pre-cursers), compliant as labeled. Adding thinner will result in a non-compliant coating. Excess thinner or reducer results in a thinner coat of finish, thus requiring additional coats to achieve the required appearance and enough thickness to provide a protective coating. |
#800 Electric BURN-IN KNIFE – 18 watt 120 Volt
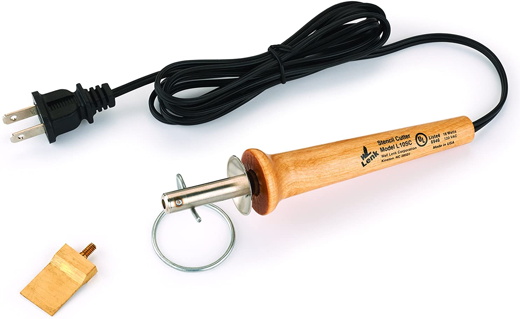 The MERIT 800 Knife is a smaller handled,
light weight, professional Burn-In Knife,
excellent for delicate work. This 120 Volt Knife features a 6 foot 2-wire neoprene
power cord and includes a wire support sand.
The mica-insulated nichrome heating element provides steady temperature and long element life
The 18 watts develops an ample temperature of 750°f. Our lighter weight knife is designed with a smaller handle, for ease of control.
The 800 knife is excellent for delicate or small repairs, especially in confined areas. – Our Favorite Electric Knife!
See more information and 800 Burn-In Kits Here
Shellac.net Wood Finish Supply![]() An Authorized Mohawk Distributor
An Authorized Mohawk Distributor
As of June 1st 2019 the H.Behlen Finishing Products
were transitioned to the Mohawk Finishing label.
Not every product was included in the transition,
in that there are good Mohawk equivalents for those items.
Many products are the exactly the SAME and others have an exact match in the Mohawk brand.
See our online catalog @ mohawakfinishsupply.com
For information or questions,
Please Phone our support line: 707-391-4042
Ultra Penetrating NGR DYE – JET BLACK
The beautiful deep JET BLACK Dye (Behlen Formula)
is back in production and SHIPPING.

Available here: in Pints, Quarts, Gallons
Ultra® Penetrating NGR (Non Grain Raising) DYE. Excellent fade & UV resistance.
Intermix to arrive at custom colors.
Reduce color intensity with NGR Reducer, Acetone, or Shellac Solvent Denatured Alcohol.
See: NGR (Non Grain Raising) Dye application & use information
Aerosol Musts
Please Read: Get Top Results from your AerosolsStorage for use: 65° F – 85° F. – Store Out of the direct sun.
Shake Well before each use.
To Understand How Important shaking and clearing the tube is
For New Cans:
Shake Well 2 Minutes: especially Colored lacquers, Stains, Glazes,
Clear Aerosols; Semi-Gloss, Satin, Matt, Flatt, Dead Flatt
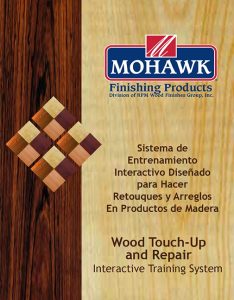
DVD de retoque y reparación de madera
Wood Touch Up & Repair DVD – SPANISHEl sistema de entrenamiento iteractivo de
Mohawk está diseñado para entrenarlo a Ud.
a hacer retoques y arreglos sobre productos
de madera haciendo uso de las técnicas más
avanzadas que existen al respecto en esta industria.
Este video interactivo incluye instrucciones
sobre las siguientes áreas:
• El análisis del daño • El relleno de los daños
• El reemplazo de colores • El reemplazo de las vetas
• La aplicación por puntos de um acabado
• El ajuste del brillo • La eliminación de rayas
• El cuidado del acabado • …Y muchas más
“Este es un excelente DVD para el aprendizaje de reparaciones de acabado de madera”
Solving Common Wood Finishing Problems
(Recommended reading for all finishers)
Regardless of your finish of choice, water or solvent based, both modern and
traditional coatings require many of the same considerations for application success.
First:
• Select a recommended finish to meet the project requirements.
• Read The Directions.
Most finishes work best at around 72°F and a humidity of 4o% or less.
• Follow the manufactuers guidelines.
Finish drying and curing depend on temperature, humidity and air flow.
So far there is Not a finish material
that says it will dry faster if you are in a hurry!
Creating a Fine Finish, by brush or spray, requires attention to many factors
including environment, finish material, selection of spray or brush equipment, and more.
Read through this entire document so you can spot finish problems
before or as they arise.
This self help problem solving guide identifies the source and the fix for many issues that can prevent the achievement of a perfect finish.
1 – Q: Shellac is an old-fashioned, outdated finish.
A: No, Shellac is all natural, organic, child safe. Shellac has more modern features
and ‘green’ benefits than any other wood finish in the world.
2 – Q: Shellac turns ugly and dark as it ages.
A: Shellac is naturally UV-resistant and does not yellow or darken with age.
The dark shellac seen in older homes is a less-refined version that was naturally dark,
or was tinted by finishers when dark wood colors were popular in the early 20th century.
3 – Q: Is shellac made from bugs or bug droppings?
A: No, Shellac is a resin secreted from the tree sap by the lac insect to form a cocoon,
much like a silk worm. It takes about 100,000 lac bugs to make 1 lb. of shellac resin.
4 – Q: Does a shellac finish turn white when water touches it?
A: A properly applied shellac finish is remarkably water-resistant and, in most cases, will stay clear after hours of exposure to water, making it a great finish for most interior surfaces, including woodwork, trim, doors, cabinets, paneling, furniture, and for floors, Button Shellac (yes, floors!)
5 – Q: Is Shellac brittle or easily scratched?
A: Shellac is a tough, durable finish that is less brittle than lacquer and is not easily scratched. The process of making Button shellac yields a tougher resin. Unlike polyurethanes, a damaged shellac finish can be easily touched up or renewed
by brushing on another thin coat.
6 – Q: Is Shellac compatible with other finishes?
A: Shellac will adhere tenaciously when applied over almost any other type of clean,
wax free, and oil free finish.
(To assure a clean surface, especially on older grimy surfaces, use a wood cleaner like
Mohawk Wax Wash, to avoid possible stains or damage from water based cleaners.)
To seal wood before applying polyurethane or other finishes,
Bulls Eye® SealCoat™ is a shellac-based universal sanding sealer that is 100% wax-free.
For refurbishing a worn finish, a SealCoat makes an excellent transitional coating or bonding coat between an unknown coating and a new topcoat.
Note: (Regular shellac may not be compatible as a sealer under certain polyurethanes, as they contain small amounts of natural wax.)
7 – Q: Can I make a Shellac SealCoat?
A: Yes a ‘SealCoat’ is a DEWAXED Shellac Resin dissolved in
Mohawk Shellac Reducer / Behkol or a 190 Proof Denatured Alcohol.
With a wide color variety of Dewaxed Shellac Flakes, you can make your own
universal sanding sealer in a range of light to deep tones to match your project.
NOW AVAILABLE

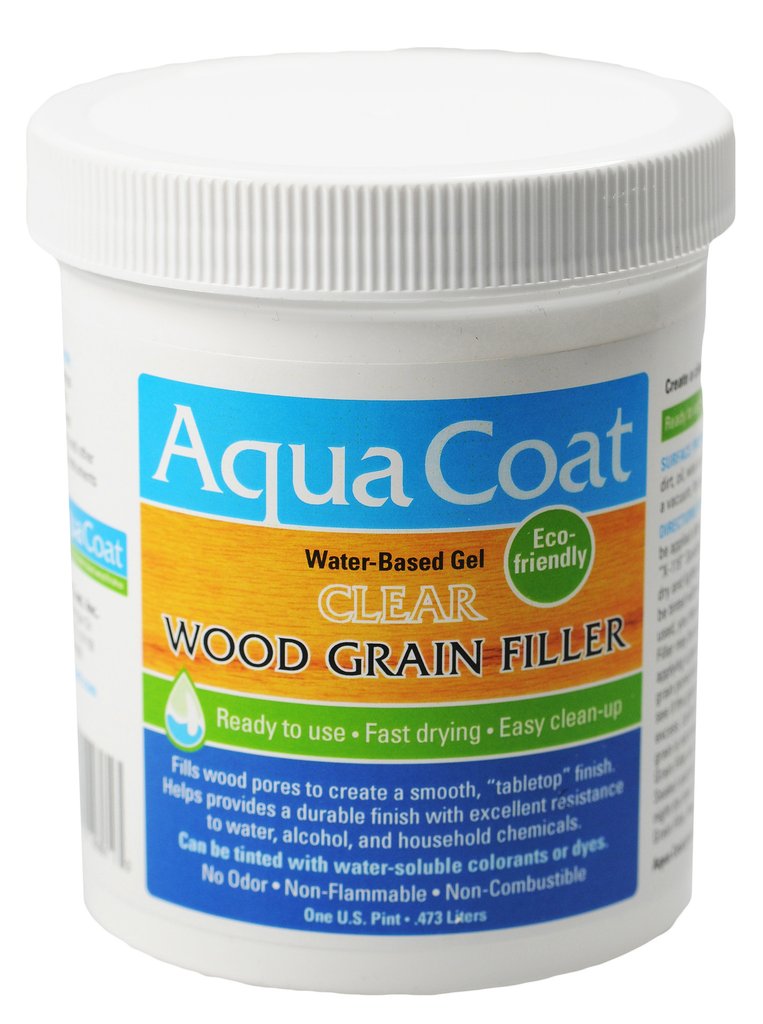
Professionally-Proven, Environmentally-Friendly Water Based Filler
• Easy application and clean-up • Non-toxic
• Non-flammable • Non-combustible
Click Here for More Information:
Aqua Coat Clear Grain Filler, the secret to smooth finish on open pore
and coarse grain woods!
Available Here:
![]()
New DEEP RED Aerosol B104-1203
is used on guitars, stringed, and percussion instruments.
Use to tone edges or create a solid opaque Red color with a few more coats.
Now Available
See: Guitar Toners
In the Art of Wood Finishing, it should certainly be true that
“Finish Follows Function”.
It is the finishers task to so assure that in fact,
Finish Follows Function.
Ron Ashby, July 2024
————————————-
From Wikipedia:
The phrase “form follows function“ is attributed to:
Louis Henry Sullivan (September 3, 1856 – April 14, 1924)[1] was an American architect, and has been called a “father of skyscrapers”[2] and “father of modernism.”[3] He was an influential architect of the Chicago School, a mentor to Frank Lloyd Wright, and an inspiration to the Chicago group of architects who have come to be known as the Prairie School. Along with Wright and Henry Hobson Richardson, Sullivan is one of “the recognized trinity of American architecture.” The phrase “form follows function” is attributed to him
For Sullivan this was distilled wisdom, an aesthetic credo,
the single “rule that shall permit of no exception.”
The full quote is:
“Whether it be the sweeping eagle in his flight, or the open apple-blossom, the toiling workhorse, the blithe swan, the branching oak, the winding stream at its base, the drifting clouds, over all the coursing sun, form ever follows function, and this is the law. Where function does not change,
form does not change. The granite rocks, the ever-brooding hills, remain for ages;
the lightning lives, comes into shape, and dies, in a twinkling.
It is the pervading law of all things organic and inorganic, of all things physical and metaphysical,
of all things human and all things superhuman, of all true manifestations of the head, of the heart,
of the soul, that the life is recognizable in its expression,
that form ever follows function. This is the law.