Lighting for Wood Finishing

 New Additions, Wood Finishing Tricks  Comments Off on Lighting for Wood Finishing
Mar 272019
 

Proper use of Light will Improve your Finish

& enable you to really SEE what you are looking at.

Lighting for shop work and finish room areas, and its correct use,
is important for obtaining high quality good looking finishes.

Lighting and Color

With translucent & clear furniture finishes light travels through all the finish layers and is reflected off the wood or substrate. The ‘Observed Finish Color’ is a combination of all the color tones in the various finish stain & dye layers combined with the wood color.

wood finish diagram
Finish Diagram of Clear or Translucent Furniture Finishes
Light travels through all the finish layers.
The Finish color is a combination of all
the colors in the various finish layers
combined with the wood color.

When studying a color we notice that its hue will vary depending on illumination and its surroundings. Illumination changes the color hue of an object due to the color available in the light source. Color is the product of wavelengths that are either absorbed or reflected by the surface of an object.
see: Color Theory and color mixing for the woodworker.

The hue appears to alter according to a colors surroundings. Our retina is affected by these wavelengths and the stimuli are communicated to the cortex, that part of the brain that enables us to distinguish one shade from another.

Light bulbs are available in:
1 – Warm white or soft white (2700-3600 °K)
2 – Cool white (3800 -4800°K )
3 – Daylight or Full Spectrum designations (5000°K) or higher.
The color spectrum output of a bulb is rated in Kelvin° color temperature (has nothing to do with the heat a bulb produces). Full Spectrum Daylight bulbs for incandescent and compact or linear fluorescent are available in a range of wattages and styles.

You need the entire color spectrum in your light source to evaluate or match stain and finish colors accurately. Full Spectrum Daylight Bulbs with a high CRI (color rendering index) are a must. Better daylight bulbs will list the CRI on the package, the higher the number the better. A CRI above 85 is good for shop use. Bulbs rated above 95 are expensive and are not needed for wood finishing.

The very best light for critical color matching work is natural daylight (out of direct sun glare).

SEE what you look at !

Proper use of lighting will automatically improve your finish quality.
When you can really see what is happening the finishing process is easier.

Now you have the right light to see color – Correct use will enable critical evaluation of the surface condition prior and during the finishing process.

Fluorescent lighting (Cool White or Daylight bulbs only) is fine for ambient lighting or general work area illumination. Avoid using warm white or soft white bulbs they bathe everything in a yellowish light. The shadow-less lighting produced by fluorescent bulbs tends to hide surface defects.

Inspection Lighting:

A shadow producing light source is necessary to see that a surface is free of any unwanted defects.

Use incandescent bulbs in a reflector for inspection lighting in:
1, surface prep areas (sanding, dying staining)
2, finishing areas
3, final rub-out, waxing or polishing.

Arrange inspection lighting so that the light is aimed at the work and toward the operator so that any defect is accentuated by the shadow or reflection it produces. When you can easily see: scratches from sanding, glue smears, minor dents, brush marks, finish drips, runs, curtains or sags, and polishing or rub out marks it will be much easier to achieve the desired, defect free, finish look.

•••••
This page & all contents Copyright © 1995-2020, Ron Ashby &
Shellac.net Wood Finish Supply.
All rights reserved – (may be used in complete form with credit line above)


CLEAR WOOD GRAIN FILLER

 Product Data Sheets  Comments Off on CLEAR WOOD GRAIN FILLER
Mar 182017
 

NOW AVAILABLE

Aqua Coat logo

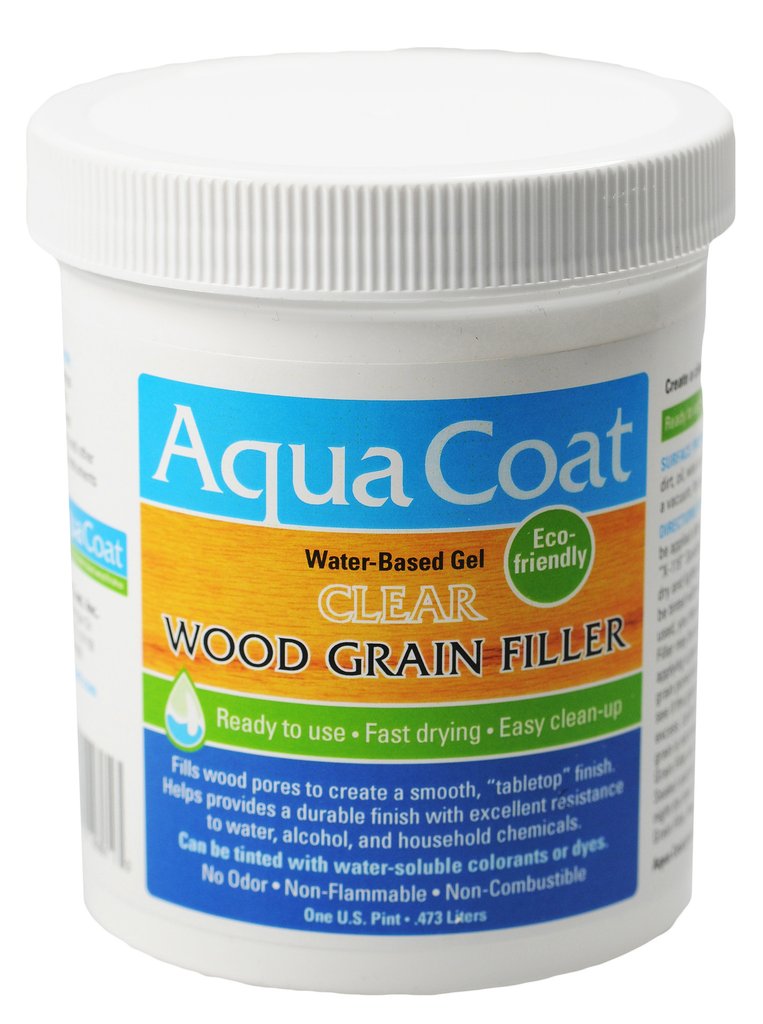
Aqua Coat CLEAR WOOD GRAIN
& Pore FILLER

AQUA COAT Clear Wood Grain Filler

Professionally-Proven, Environmentally-Friendly Water Based Filler
•  Easy application and clean-up  •  Non-toxic
•  Non-flammable  •  Non-combustible
Click Here for More Information:

Aqua Coat Clear Grain Filler, the secret to smooth finish on open pore
and coarse grain woods!
Available Here:


Waxing Furniture

 Product Data Sheets  Comments Off on Waxing Furniture
Jan 012012
 

Waxing Furniture & Fine Wood Finishes

Apply Sparingly – a little wax goes a long way!

For all wax polishing, wait until all the solvent evaporates prior to buffing.
Paste Waxes differ in composition; some blends require longer times for the solvent,
that makes for the ease of wax application, to evaporate.

It is important to apply all paste waxes sparingly, in a THIN EVEN coat.
This will assure even drying and yield an even sheen result when buffing
(a thicker area of wax will dry slower, and those areas will not buff
to as high a sheen).

If you buff too soon, the buffing is just pushing soft (uncured) wax around.
I usually wait (to allow the solvent to evaporate) on furniture makers waxes for an hour & up to 4 hours before buffing.
Use a Soft 100% cotton cloth (free of any seams or stitching) for buffing.
Old worn out 100% cotton t-shirts, linens, diapers and well used and laundered terry cloth will work well.
The softer the buffing cloth, the higher the resulting sheen.

On older pieces of furniture, and other wood surfaces, it is important to clean the item first of any dirt, oils or accumulated grime.
Residual oils, grime and some aerosol care products left on the surface can prevent the wax from drying properly and can lead to a splotchy uneven result.
Maintain and protect the waxed surface with another thin coat of wax as needed.

A good wax layer is the best protection from moisture, dirt and abrasion.
Avoid the use of all maintenance oils & silicone containing aerosols.

To: Paste Wax Polishes & care

Sep 202011
 

Aerosol Application Tips

H. Behlen aerosols are convenient, portable tools that provide professional solutions for touch up and repair or wood finishing projects. This sheet is designed to provide users with common tips that are specific to our aerosol products.

H. Behlen Aerosol “Golden Rules”

1. Always use in a well ventilated area that for best results is at least 70 degrees.
2. Never apply near an open flame because aerosols are flammable.
3. Before using any H. Behlen Aerosol always shake the can vigorously up and down until the agitator balls inside are loose. Once the agitator balls are loose, swirl the can in a circular motion for 1 minute. This will thoroughly mix any colorants or flatting agents inside the can so that when you spray the can it will be what you expect it to be.
4. After use, always turn the can upside down and press the spray button until only propellant is coming out of the can. This will mean that you have cleared the tube and nozzle so the can will be ready to spray the next time that you need it.
Failure to do this could result in the tube or nozzle clogging, which will prevent the can from spraying.

Jet Spray™ Lacquer Toners, Master Toner & Guitar Toner Aerosols

•  Toners are used to shade color onto areas that have already been finished but are off color slightly or need additional accent color like sunburst on a guitar. Door or drawer edges are common areas where toners are used.

•  Toners are applied in multiple, light even coats. Avoid adding too much color too quickly by spraying on in heavy coats.

•  If the sheen is okay with the toner color, then it is not necessary to apply an aerosol topcoat over it unless;  a) you prefer a different or more durable final finish such as a Pre-Cat, or b) you need to adjust the sheen either higher or lower.

H. Behlen Sanding Sealers

•  Sanding sealers such as Top Coat Sealer and Jet Spray™ Sealer are used to provide a smooth and level surface for the final finish. Jet Spray™ Sanding Sealer is commonly used under nitrocellulose or acrylic lacquer topcoats. These nitrocellulose sealers are typically lower solids, which build slower than Vinyl Sealer and Pre-Catalyzed Sealer.
Most have sanding agents that powder when sanded. Jet Spray™ is a common sealer to use on furniture.

•  The Vinyl Sealer aerosol and Pre-Catalyzed Sealer are commonly used for cabinetry or other areas that will be top-coated with a pre-catalyzed finish or the Stringed Instrument Lacquer. These sealers offer higher build, increased moisture resistance, and are designed for higher traffic areas.

•  All sealers may be applied in light even coats. Usually, at least 2 coats of sealer are applied. Each coat should be sanded with at least a 280 grit abrasive, and top-coated with a final finish product.

•  No sealer is designed to be the final finish because they are typically softer than topcoat finishes.

 H. Behlen Clear Topcoat Finishes

•  Topcoat finishes include nitrocellulose, acrylic and pre-catalyzed choices that are available in different sheens, typically Gloss and Satin.

• Nitrocellulose finishes include Jet Spray™ Clear Lacquers, Water Clear Acrylic, Lacquer for Brass, Stringed Instrument Lacquer,

•  Top Coat Lacquer and Smooth Coat Lacquer, which are typically used on furniture and other indoor wooden surfaces.

•  Pre-Cat Lacquer is typically used on cabinetry and other high traffic areas where moisture resistance and durability are a concern because they cross-link after application and become harder and more durable than nitrocellulose lacquers.

•  When top coating a spot repair, apply the lacquer in light coats, fully depressing the spray head.

•  When coating a complete section, such as an end table top or the entire side of a table, apply topcoat finishes in light even coats.

To assure a smooth finish, we recommend that you apply the product by starting at the edge nearest you and spraying in overlapping lines (parallel to the edge) working toward the edge farthest away from you. Usually 2-3 coats are used

H. Behlen Specialty Aerosols

•  Jet Spray™ Blush Eraser is used to eliminate blushing (white, milky appearance of finish if applied in a humid environment), overspray (dry spray from the last coat that did not melt into the surrounding area leaving the surface feeling gritty) or to melt or re-flow a finish with light scratches that can be seen but not felt.  Jet Spray™ Blush Eraser is applied by misting it onto the surface very lightly. If sprayed too heavily, it will run or cause the finish to stay wet for longer than you prefer. This product can be used with any sheen.

•  Stains, Glazes may be applied as heavily as needed, and followed by removing the excess by wiping or brushing to color. Stains and glazes are particularly prone to clogging the pick-up tubes and nozzles if the aerosols are not cleaned properly after use.

•  Polishes are applied by misting onto the surface or onto a clean cloth, applied to the entire surface, and then buffed to the final luster.

 •••••
To:
Behlen Aerosol Listing

Shellac.net
Wood Finish Supply

 818 #A Jackson Street, Napa CA 94559

Mar 062010
 

Aerosols for
the Wood Finishers Tool Box

We get a lot of questions on ‘Why so many clears?’

The simple answer is that one finish cannot provide the various requirements of a specific use or give the desired look to a finishing schedule. Each aerosol product is formulated to provide a specific performance function or solution for the finisher.

In over 25 years the only complaints we have had about aerosols was when the craftsperson was sold the wrong clear or toner to produce the desired result. In most cases we fault the dealer for not asking how the product was to be used, or for not understanding their customer needs.

Selecting the Proper Aerosol for the specific job at hand will give the finisher the right tool to produce superior results.

We hope the ‘Aerosol Notes’ will help clarify uses and advantages of the various coatings.

Notes on:Aerosol Sanding sealers & Clear CoatingsAerosols & Finishes for the Luthier and Guitar BuilderAerosol Use Tips& More coming

We welcome your thoughts or questions —
Please:
Email comments here

•••••